Kilimanjaro Climbing FAQs

Which Kilimanjaro route should I climb?

There are seven park gates and nine routes, yet only three routes to the top from 15,000′ upward. About 4 out of 5 of trekkers climb the highly traveled Marangu Route which is also know as the “Coca Cola” route due to the fact that it “goes down easy, just like the drink”. This is the route made popular by the recent IMAX film.kilimanjaro faqs Most of the rest of the climbers either climb the Machame Route, Rongai, or the rugged Umbwe Route. If you have more time the Shira and Lemosho routes enjoy the highest success rate. We recommend the Machame route which is know as the “whiskey route” due to the fact that it is a little harder to “swallow”. This route allows for proper acclimatization by hiking to higher elevations during the day and then returning to lower elevations to sleep. It also has some of the best scenery. Since you start on the western side of the mountain and then traverse around the southern side and eventually make your way to the summit on the eastern side you get a chance to see more of the mountain. We also recommend the Lemosho and Rongai Routes. These are considered among the easier routes up the mountain and the Rongai route connects up with the Marangu route on the third day.

What Is your success rate for summiting Kilimanjaro?

The success rates with our guides are outstanding compaired to the overall success rates for all climbers who attempt to reach the top. Our guides have a success rate of reaching Uhuru Peak of over 90% overall and over 95% on our 9-day Shira – Western Approach Route. The more time you spend on the mountain, the higher the success rate and we favour the longer routes.kilimanjaro faqs While we cannot guarantee that you will succeed, we can guarantee that we will give our absolute best effort in helping you succeed.

How fit do I need to be?

Though many deem Kilimanjaro “easily accessible”, it is one of the most underestimated mountains in the world. The trails themselves do not require technical mountaineering skill, yet the effects of altitude consistenly turn back many trekkers from Kibo’s upper slopes. Altitude sickness is an ambiguous phenomenon, and it is nearly impossible to predict how and when it will affect you. You don’t need to be an athlete to climb this mountain, but you certainly need determination and mental willpower. It will most likely be one of the most physically and mentally difficult thinks you will do in your lifetime. You’ll also need to commit yourself to a physical training regimen. We recommend a varied physical routine to include strength training, aerobic cross training, and hiking (not necessarily at high altitude), simply to prepare your body for the stress of being on the trail. Generally, the better overall shape you are in the easier it will be for you to handle the trek. Although we have seen time and time again where the “little old lady” reaches the summit while the mega-athlete is turned back. There are many other factors that will either aid or weaken you, and this is where our experience plays a huge role. From our detailed recommended training program to our expert mountain guides, we have taken every measure to ensure that you have the best possible chance of safely reaching the summit of Kilimanjaro.

How many miles will I trek each day?

Most Tanzanians measure distances by the amount of time it takes to get from point A to point B.kilimanjaro trekking faqs Furthermore, each climber takes a different pace. When we provide the details for each route, we have given a time estimation for the day’s hike. You may go slower or you may go faster, but you will find that you have plenty of time to complete each day’s hike. Summit day is by far the most grueling and you will cover almost 19 miles and you will be on your feet for at least 16 hours or more!

How fast will we be hiking?

You need not worry, as this is a common concern. From the onset our guides will constantly remind you, “pole pole” which means “slowly slowly.” By walking slowly and taking your time, you’ll not only give your body a better chance to acclimatize to the altitude, but you will have more time to enjoy the marvelous scenery you’ll pass along the way. When you first leave the starting gate your guide will set a pace that may seem painfully slow but like the story of the Tortoise and the Hare, slow and steady wins the race. Plenty of time is allotted each day to reach camp, even for those who like to go very slowly.

What if I can’t make it to the top?

Some climbers may fall short of Uhuru Peak, but not at the expense of their overall experience. Just because you may not make the summit all is not lost. There are many wonders on Kilimanjaro, and the experience is rewarding even for those who never reach the top. If one or more members of a group decide they cannot continue, or if a guide deems it unsafe for an individual (or a group) to continue, they will be escorted down to the most convenient campsite or hut. Our guides intimately know the network of shortcuts to escort climbers to safety, and they are trained to act quickly and calmly.

How qualified are Jambo Destinations guides?

Our guides are all certified and carry a valid certificate allowing them to guide on Kilimanjaro. They are also certificated with Wilderness First Responder (WFR) training. Their English is excellent, and their knowledge of the flora and fauna is remarkable. You can be confident that you will be led by a team of qualified, well trained guides who are highly recommended (see Testimonials).

What will the accommodations be like?

Most Jambo Destinations treks are on the routes that do not have sleeping huts. Therefore, Jambo Destinations provides Mountain Hardwear tents. These “3-man” tents are provided for every one – two people, depending on the composition of the group. We also provide sleeping pads, but many people prefer to bring an additional sleeping pad of their own for added comfort. On your hike, the porters will carry the tents, and all your gear and go ahead of you. When you reach your camp in the afternoon your tent will be set up and ready for you. On most routes, enclosed pit latrines are available at each camp site and some campsites have newly constructed ablution blocks. The new facilities are generally okay, but to be very honest, some of the older toilet facilities are found to be very “disgusting” by most people. They are essentially a wooden structure with a hole cut in the floor. Not everyone “hits the hole” resulting in less than sanitary conditions, so Jambo Destinations provides a chemical “sit-down” toilet in a small private tent for our own campsite. The porters will bring this along to each new campsite, as well. Showers are not available on the mountain, but a bowl of hot water is provided for each person every morning and when you arrive in camp each afternoon. Before every meal we provide soap and hot water, for washing your hands. You’ll enjoy each breakfast and dinner (and lunches during bad weather) in a dining tent, complete with chairs and a table.

What about tipping?

Tipping is a common practice on Kilimanjaro, as a way of expressing your appreciation for the services provided to help you make a successful climb, however, it is completely at your discretion. Because a lot of clients do ask for guidance on tipping, we have put together the attached set of tipping recommendations.

Do you have any other travel tips?

There are lots of tips we can provide to you, but one common problem is that people traveling with US dollars don’t realize that is Tanzania you can only use bills that are dated 2006 or later. Please don’t bother bringing any USD dated earlier than 2006.

Mountain Sickness and Medication

If you are planning to climb Mount Kilimanjaro you will sooner or later hear about altitude sickness.For those unfamiliar with the ins and outs of altitude illness, here are answers to the most common questions regarding mountain sickness.

The definition of altitude

High Altitude: 1500 – 3500 m (5000 – 11500 ft) Very High Altitude: 3500 – 5500 m (11500 – 18000 ft) Extreme Altitude: above 5500 m (18000 ft)

What is altitude sickness?
Altitude sickness is a range of symptoms that can occur when someone ascends to a high altitude too rapidly, without sufficient acclimatization. The body can adjust to the reduced air pressure at higher altitude, but only at a rate of about 300 m (1000 ft) altitude gain per day.
If you ascend faster, and everybody climbing Kilimanjaro will, then you may develop altitude sickness.

There are three main forms of altitude sickness: AMS (Acute Mountain Sickness) is very common when climbing Kilimanjaro. HAPE (High Altitude Pulmonary Edema) is a fluid build up in the lungs. HACE (High Altitude Cerebral Edema) is fluid build up in the brain. Both HAPE and HACE are potentially fatal but are thankfully extremely rare during a well planned Kilimanjaro climb. What exactly causes the individual symptoms of altitude sickness is still not fully understood. If you want to know more details, there is a link to an excellent tutorial at the bottom of this page.

There is also a range of other symptoms you are likely to experience during a Kilimanjaro climb due to the altitude. They are considered normal and shouldn’t worry you:

You breathe faster, you are out of breath sooner, you may experience periodic breathing at night (where you stop breathing for up to 15 seconds, and then breathe very fast to make up for it, scary but harmless), you may wake up frequently at night, You need to urinate a lot more often.
None of those symptoms are altitude sickness.

What are the symptoms of altitude sickness?

The symptoms of AMS are headaches, loss of appetite, nausea, vomiting, sleeplessness, fatigue, dizziness. Everybody can expect to experience at least some of these symptoms in a mild form. The most obvious symptoms for HAPE are extreme breathlessness, even at rest; rattling breath, coughing with pink froth and blue lips or finger nails.
HACE becomes apparent as a lack of coordination, inability to walk in a straight line, confusion and irrational behaviors (to the point of not acknowledging the symptoms).

How dangerous is altitude sickness?

The symptoms of acute mountain sickness as described above are self limiting and not dangerous. In fact, your guides may tell you during the briefing not to worry, that it is totally normal to be throwing up repeatedly during that last final push top the summit. Nice… However, if you do experience symptoms, your guides should also keep monitoring you, because AMS can progress to one of the more severe forms of altitude sickness.

HAPE and HACE are potentially fatal! Make sure that you always remain in contact with your guides and let them know exactly how you are feeling. Also keep an eye on your climbing partners, since people suffering from these severe conditions may not be able to correctly assess their own condition. Anybody experiencing symptoms that could indicate HAPE or HACE needs to descend IMMEDIATELY or they will die.
But please don’t panic now. As I said above, these conditions are extremely rare, provided you act sensibly when on the mountain.

Who gets altitude sickness?

Anybody can get altitude sickness. There is no way to predict how your body will react if exposed to high altitude without proper acclimatization. Susceptibility to altitude sickness is random. Fitness is no protection. People who are extremely fit and exercise a lot get it just an easily as couch potatoes. There are many stories that indicate they may be even more susceptible!
Men appear to be more susceptible than women, especially young and fit men. (Competitiveness and the desire to show off plays a part in this. Men will often ascend faster. Too fast.)
Older people seem to be less susceptible. (Older people will ascend more slowly, and nothing protects you better from altitude sickness than ascending slowly.)

When do you get altitude sickness?

Highly susceptible people can experience symptoms from 2500 m (7000 ft) onwards, in rare cases even below that. The chance of developing AMS increases with the height but the rate of altitude gain is even more important. Mt. Kilimanjaro is 5895 m (19340 ft) high. Pretty much everybody on a Kilimanjaro climb will experience some symptoms of altitude sickness during that last push to the summit.
There are other factors that increase the likelihood of altitude sickness, apart from the absolute height itself:
Rate at which a height is achieved (the faster you ascend the bigger the risk of developing symptoms, this factor is more important than the absolute height itself!)
Time spent at height (symptoms start appearing within 6-10 hours though they can be delayed)
Physical exertion
Dehydration

Symptoms of acute mountain sickness typically take one or two days to disappear. If you keep ascending they may not go away. For most people the symptoms come and go during the day, disappear overnight, only to come back the next day as the climb continues. AMS can be very unpleasant, but with the right preparation and at a sensible pace, most people can climb to at least the last camp below the crater rim (around 5700m). It’s that last push to the summit where AMS becomes the make it or break it issue.

You climb Kilimanjaro with knowledge that every detail of your trip has been designed by one of the professional mountain guide and high altitude experts.
Our first goal Your safety is our paramount concern on your Kilimanjaro trek. You leave home with the comfort of knowing that during your trek all you have to worry about is putting one foot in front of the other. We take care of the rest.

Twice a day our guides perform a through health check, using their specialized High Altitude Medical Paper and conjunction with pulse-ox meters. Regular medical checks help keep your motivation and our guides can determine your condition.

Kilimanjaro health, safety and rescue.

The Marangu Route, with its diverse landscape and fantastic views, offers a unique experience to test your will power, fitness finesse and mental strength. The route takes you through lush rainforest, where colobus monkeys roam, into heath and moorland, with its many ferns and ericas, until finally reaching the icy caps of the mountain top. The varying altitudes on this 7 day tour as well as a little help from lady luck offers a good environment for acclimatization, enhancing your chances of reaching the summit. Overnights on the Marangu Route will be in tents.

For Kilimanjaro climb safety measures come first before rescue

Based on the above subject positive altitude adaptation is a basic factor of Trekking Kilimanjaro safely and sound.

Safety and Rescue for our affordable Kilimanjaro climb.
Altitude sickness is triggered by the miscarriage of the body to adjust fast enough to the decreased level of oxygen in the air as the altitude increases. It is possible that you will experience some form of minor altitude sickness on a high mountain trek.

There are many and different indicators but the most common ones are headaches, dizziness, lucky of sleep, nausea and appetite loss. The mentioned symptoms can be regarded as normal for climbing Kilimanjaro. But, complications might develop on Kilimanjaro, so people who attempting to climb the mountain needs to be alert of the risks involved.

Based on our experience severe altitude sickness rarely develops for climbers. Cerebral edema is caused by fluid leakage from the brain. Cerebral edema is acknowledged by severe headaches accompanied with severe loss of balance and light-headedness. Pulmonary edema is produced by fluid accumulation in the lungs. Pulmonary edema is presented by cracking noises coming from the chest of affected person and when coughing up pink mucus is present. All of these conditions lead promptly to death unless instant descent is done.

Our concrete experience is that there are three main stages of reaching successful acclimatization. You will possibly still suffer some minor symptoms of altitude sickness before acclimating to function normally with reduced levels of oxygen.

Drink plenty of water.
Intake of fluid not less than 4 to 5 liters a day is highly recommend. This will improve blood circulation and other body functions. And you also need to drink 3 liters of water per day. Urine is the best judgement, if your urine is clear and copious, you are drinking enough.
Walk slowly. It is important to give as little force as possible on the body while it is trying to adjust to a reducing oxygen supply. With an exceptional of a very steep uphill section, otherwise, your breathing rate while walking should be as if you are trekking down the street at home.
Climb high sleep low. This merely means climb to a higher altitude during the day and the sleep at a lower altitude at night. This is done through a well arranged itinerary that includes an afternoon acclimatization hikes to higher levels (climbing more high past the camp) and then descent down to the camp (sleeping low). Most of our itineraries have this feature, but because of time and distance to be covered the longer 8 and 9 day climbs have more acclimatization walks.

Kilimanjaro Search and Rescue

Search and Rescue: Search and Rescue is a new service on Mount Kilimanjaro to ensure your safety while climbing the mountain. Kilimanjaro Search and Rescue offer the best and modern search and rescue services using helicopters that can fly in any weather. Kilimanjaro SAR strives to make Kilimanjaro the safest tourist destination in Africa.

An emergency medical service to ensure your safety while hiking Mount Kilimanjaro and Mount Meru with helicopters that can be deployed within 5 minutes. We ensure a quick response and guarantee your safety regardless the season.The helicopter will pick you up from the designated area on the mountain, where the medical team will immediately start an in-flight medical treatment. Upon landing at KIA/Moshi Airport there will be transport, to take you to your hotel. If you require further medical attention upon landing, you will be taken to a modern private High Altitude Medical clinic ideal for Acute Mountain Sickness (AMS).Kilimanjaro SAR accepts insurance with Evacuation coverage up to 6,000 meters above Sea Level. Please be aware that coverage and eligibility requirements for this benefit differ by policy. View/Download information about the altitude limits offered by different insurers (153KB PDF provided by Kilimanjaro SAR). The website linked below showcases 75 different policies and providers that offer Medical Evacuation coverage.

Insurance: It is highly recommended that you have insurance that covers emergency evacuation 6,000 meters above Sea Level and you fill the required forms for SAR before starting your trek.

Kilimanjaro for women

Women climbers on Kilimanjaro

Women’s presence on Kilimanjaro is steadily increasing year over year. The success rates of reaching the summit are similar for men and women.

Jambo Destinations is prepared to deliver a great experience for women climbers, whether in women-only climbing groups, solo female climbers, or women in a mixed-gender climbing group.

The crew. Our guides and porters treat all climbers, men and women, with respect and kindness. Please report any questions or concerns to your guide.  

Mountain safety. Kilimanjaro is safe for men and women alike. There have been no reports of any attacks or issues faced by solo female climbers, to date.

Safety in Tanzania. Jambo Destinations provides door-to-door service with trusted drivers between airports, hotels, and adventures. Tanzania is generally safe for women during the day, but women should avoid going out alone at night.

Hotel and lodge accommodations. During safaris, you may stay in wilderness lodges, all of which are trusted and provide a great, safe environment for women and other travelers alike. If you need a hotel before/after a safari or climb, Jambo Destinations will recommend or book your stay in one of our trusted high end hotels.

Accommodations on the mountain. The camp accommodations can be arranged to ensure for women to share the tent with other women. Jambo Destinations recommends women use sleeping bags made for women, since the design differs between men’s and women’s. In general, women tend to “sleep colder” and often find that men’s sleeping bags are too large and therefore hard to achieve optimal temperature control. When renting a sleeping bag, please request a women’s sleeping bag specifically. If none are available, women can rent a men’s sleeping bag and should also bring a warm sleeping bag liner, or even a lighter women’s sleeping bag to be used inside the men’s sleeping bag – this is particularly important for those women who tend to sleep very cold.

Bathroom facilities. Jambo Destinations provides private toilets at all campsites, and warm water daily for personal hygiene.

Women’s packing list. In addition to the standard packing list, women should consider adding:

  • sports bra that is moisture-resistant
  • thick sleeping bag liner or even a lightweight sleeping bag to be used inside the large rental sleeping bag, (for extra warmth)
  • toe warmers or mountaineering boots, if your feet tend to get cold. Mountaineering boots are warmer than hiking boots and women tend to get colder than men, especially on summit day. Consider bringing mountaineering boots in addition to or instead of hiking boots, which are recommended by most Kilimanjaro packing lists
  • hand warmers (you can also use toe warmers in your gloves or mittens)
  • face protection (to prevent sun burn and keep their moist and warm, to protect from Khumbu cough, common at high altitudes)
  • a belt to accommodate any potential (likely) weight loss
  • a bandana, headband or beanie, and extra rubber bands to keep long hair under control (it will need all the help it can gets after a week without a wash)
  • feminine hygiene products. Please note that high altitude can play havoc with menstrual cycles, and many women experience surprises with periods that are irregular, longer or heavier than usual. Come prepared.
  • Biodegradable zip-lock bags for storing used hygiene products (avoid leaving tissues and other paper waste on the mountain – it is very unsightly!). Please note that Tanzania does not allow the use or import of plastic bags
  • pee bottles (to avoid nighttime trips to the bathroom)
  • a ‘she-wee’ (to help pee on the mountain), though most break spots will offer either vegetation or rocks to hide behind
  • wet wipes (for personal hygiene), including facial wipes
  • dry shampoo
  • skin cream and lotion to prevent or alleviate dry skin, including after-sunburn cream or lotion
  • nasal spray (recommended for use in dry high-altitude air, to prevent nose bleeds and Khumbu cough)
  • moisturizing eye drops

List of Kilimanjaro Equipment and Packing List

We recommend that all clothing (and anything you do not want to get wet) be packed in water proof sacks or plastic so that it does not get wet if it rains!!
It is ideal to pack your Kili Trekking gear in a duffle bag as close to these dimensions as possible: 40x18x18 and right around 33 pounds (15 kg). This makes it easier for the porters to carry!!
You do not have to get everything as it appears on the list – this is just recommendations!

Footwear

Tennis/camp shoe: to wear around camp

Hiking Boots: 1 pair of sturdy boots in which you can wear a light synthetic sock under a heavy sock comfortably. Boots should be water proof!

Gaiters: 1 pair used to keep rocks out of shoes and boots dry

Wool or Pile Socks: 1 pair/hiking day – heavyweight wool or synthetic socks (wool is warmer) to be worn over the liner socks. When layering socks, check fit inside boots. Remember to keep one fresh, dry pair of socks available at all times.

Liner Socks: 1 pair/hiking day – smooth thin wool, nylon or Capilene to be worn next to the skin. This reduces the incidence of blisters and makes the outer sock last longer before needing to be changed. They should fit well with your heavyweight socks.

Clothing

2 pair lightweight long underwear. Tops & bottoms, Capilene, other synthetic or wool. No Cotton. Lightweight is preferable as it is more versatile (worn single in warmer conditions and double layer for colder). One set of white for intense sunny days and one pair of dark for faster drying gives the most versatility.

Fleece/Synthetic jacket: Mid- to Heavyweight pile (Polartec 200-300 depending upon cold tolerance).

Insulating Pants: Fleece pants (Polartec 200-300 depending upon cold tolerance ) or equivalent. Be sure pants can be removed while wearing boots.

Down or Synthetic jacket. Medium to heavy weight with hood for cold summit temperatures. Shell Rain jacket – Water Proof – Gore-Tex or equivalent.

Shell Rain pants – Water Proof – Gore-Tex or equivalent. (side zips optional) (Shell Jacket and pants must fit over insulation comfortably.)

2 synthetic shirts, long sleeve

2 synthetic T-shirts

2 pairs synthetic hiking shorts

2 pair synthetic trekking pants

1 pair of underwear/hiking day

Women: supportive sports bras

Handwear

Light synthetic gloves: 2 pair pile or similar quick drying material. Should fit comfortably inside heavy mitts.


Mitts with Gore-Tex shells. 1 pair each. A good pair of ski mittens/gloves work well.

Headwear

Balaclava. Look for a simple lightweight model.

Warm Lightweight pile/wool hat. Hat should cover ears.

Baseball cap or other sun hat. One with a good visor to shade the nose and eyes. Synthetic is nice as it dries quickly.

Bandana. Used to shade your neck.

Glacier glasses. 100% UV, side-gussets are preferable

Toiletries

Biodegradable shampoo

Biodegradable soap

Lip balm

Deodorant

Toothpaste/toothbrush

Brush/comb

Wet wipes

Lotion

Feminine hygiene supplies

Nail clipper

First Aid Kit

Blister bandages / mole-skin

Small bandages (band-aids)

Elasticized support bandage (ace-wrap)

Safety pins

Small pair of scissors

Antiseptic wipes

Talcum Powder

Sun block for skin and lips

Insect repellent

Medicines (your medications should be discussed with your physician):

Analgesics (pain killers): Acetaminophen (ie. Tylenol), asprin, ibuprofen

Anti-Allergy: Hydrocortizone (ointment), diphenhydramine hydrochloride (oral antihistamine), (ie. Sudafed, Benadryl)

Antibiotics; Bacitracin (ointment), Erythromycin*, Ciprofloxacin hydrochloride* (Cipro)

Antacids Bismuth sabsalicylate (ie. Pepto-Bismol)

Anti-diarrhea; Loperamide hydrochloride (ie. Immodium)

Altitude illness medicine; Acetazolamide* (diamox), Dexamethazone*, Nifedipine*

Sterile eye drops

Anti-malarial prophylaxis medicine*

* Prescription medicines

IMPORTANT: Make sure to check with your travel clinic on recommended vaccinations and malaria medication.

Climbing and Camping Equipment

We provide tents

1 soft (no hard frame or wheels) duffel bag (porters will carry)

1 daypack

Daypack rain cover for rain

Plastic bags of different sizes (to protect clothes against rain)

1 warm mountain sleeping bag (0 degree Fahrenheit, -18 degrees Celsius)

1 sleeping pad

2 trekking poles – highly recommended

1 headlamp (with extra batteries and light bulb)

3 one-liter water bottles, or substitute with hydration pack

Water filtration/purification system or iodine tablets (optional)

Sun block. We suggest the highest possible SPF rating

2 bandanas

Camera Equipment

Cameras whether Video or film, need to be protected against the severe cold weather either in warm pouch or the interior pockets of your clothing. Do not keep in your backpack at higher elevations. For digital equipment, check with the manufacturer’s specifications for temperature range (especially battery life), water tightness and general hardiness.

List of Kilimanjaro Equipment and Packing List

We recommend that all clothing (and anything you do not want to get wet) be packed in water proof sacks or plastic so that it does not get wet if it rains!! It is ideal to pack your Kili Trekking gear in a duffle bag as close to these dimensions as possible: 40x18x18 and right around 33 pounds (15 kg). This makes it easier for the porters to carry!! You do not have to get everything as it appears on the list – this is just recommendations!

Footwear

Tennis/camp shoe: to wear around camp

Hiking Boots: 1 pair of sturdy boots in which you can wear a light synthetic sock under a heavy sock comfortably. Boots should be water proof!

Gaiters: 1 pair used to keep rocks out of shoes and boots dry

Wool or Pile Socks: 1 pair/hiking day – heavyweight wool or synthetic socks (wool is warmer) to be worn over the liner socks. When layering socks, check fit inside boots. Remember to keep one fresh, dry pair of socks available at all times.

Liner Socks: 1 pair/hiking day – smooth thin wool, nylon or Capilene to be worn next to the skin. This reduces the incidence of blisters and makes the outer sock last longer before needing to be changed. They should fit well with your heavyweight socks.

Clothing

2 pair lightweight long underwear. Tops & bottoms, Capilene, other synthetic or wool. No Cotton. Lightweight is preferable as it is more versatile (worn single in warmer conditions and double layer for colder). One set of white for intense sunny days and one pair of dark for faster drying gives the most versatility.

Fleece/Synthetic jacket: Mid- to Heavyweight pile (Polartec 200-300 depending upon cold tolerance).

Insulating Pants: Fleece pants (Polartec 200-300 depending upon cold tolerance ) or equivalent. Be sure pants can be removed while wearing boots.

Down or Synthetic jacket. Medium to heavy weight with hood for cold summit temperatures. Shell Rain jacket – Water Proof – Gore-Tex or equivalent.

Shell Rain pants – Water Proof – Gore-Tex or equivalent. (side zips optional) (Shell Jacket and pants must fit over insulation comfortably.)

2 synthetic shirts, long sleeve

2 synthetic T-shirts

2 pairs synthetic hiking shorts

2 pair synthetic trekking pants

1 pair of underwear/hiking day

Women: supportive sports bras

Handwear

Light synthetic gloves: 2 pair pile or similar quick drying material. Should fit comfortably inside heavy mitts.

Mitts with Gore-Tex shells. 1 pair each. A good pair of ski mittens/gloves work well.

Headwear

Balaclava. Look for a simple lightweight model.

Warm Lightweight pile/wool hat. Hat should cover ears.

Baseball cap or other sun hat. One with a good visor to shade the nose and eyes. Synthetic is nice as it dries quickly.

Bandana. Used to shade your neck.

Glacier glasses. 100% UV, side-gussets are preferable

Toiletries

Biodegradable shampoo

Biodegradable soap

Lip balm

Deodorant

Toothpaste/toothbrush

Brush/comb

Wet wipes

Lotion

Feminine hygiene supplies

Nail clipper

First Aid Kit

Blister bandages / mole-skin

Small bandages (band-aids)

Elasticized support bandage (ace-wrap)

Safety pins

Small pair of scissors

Antiseptic wipes

Talcum Powder

Sun block for skin and lips

Insect repellent

Medicines (your medications should be discussed with your physician):

Analgesics (pain killers): Acetaminophen (ie. Tylenol), asprin, ibuprofen

Anti-Allergy: Hydrocortizone (ointment), diphenhydramine hydrochloride (oral antihistamine), (ie. Sudafed, Benadryl)

Antibiotics; Bacitracin (ointment), Erythromycin*, Ciprofloxacin hydrochloride* (Cipro)

Antacids Bismuth sabsalicylate (ie. Pepto-Bismol)

Anti-diarrhea; Loperamide hydrochloride (ie. Immodium)

Altitude illness medicine; Acetazolamide* (diamox), Dexamethazone*, Nifedipine*

Sterile eye drops

Anti-malarial prophylaxis medicine*

* Prescription medicines

IMPORTANT: Make sure to check with your travel clinic on recommended vaccinations and malaria medication.

Climbing and Camping Equipment

We provide tents

1 soft (no hard frame or wheels) duffel bag (porters will carry)
1 daypack
Daypack rain cover for rain
Plastic bags of different sizes (to protect clothes against rain)
1 warm mountain sleeping bag (0 degree Fahrenheit, -18 degrees Celsius)
1 sleeping pad
2 trekking poles – highly recommended
1 headlamp (with extra batteries and light bulb)
3 one-liter water bottles, or substitute with hydration pack
Water filtration/purification system or iodine tablets (optional)
Sun block. We suggest the highest possible SPF rating
2 bandanas
Camera Equipment

Cameras whether Video or film, need to be protected against the severe cold weather either in warm pouch or the interior pockets of your clothing. Do not keep in your backpack at higher elevations. For digital equipment, check with the manufacturer’s specifications for temperature range (especially battery life), water tightness and general hardiness.

8 Days Lemosho Route

Lemosho route approaches Mount Kilimanjaro from the west. It offers a chance to visit shira Plateau (Cathedral peak) and Shira Caldera. Lemosho route crosses from Shira Ridge to Shira 2 camp, in a pleasant hike. Climbers encounter low traffic until the route joins the Machame route. Afterwards, Lemosho follows the same route as Machame route trough Lava Tower, Barranco and Barafu, known as the southern circuit. The minimum days required for this route is 7 days, but 8 days is recommended as it will give more chance to acclimatize and achieve the summit.

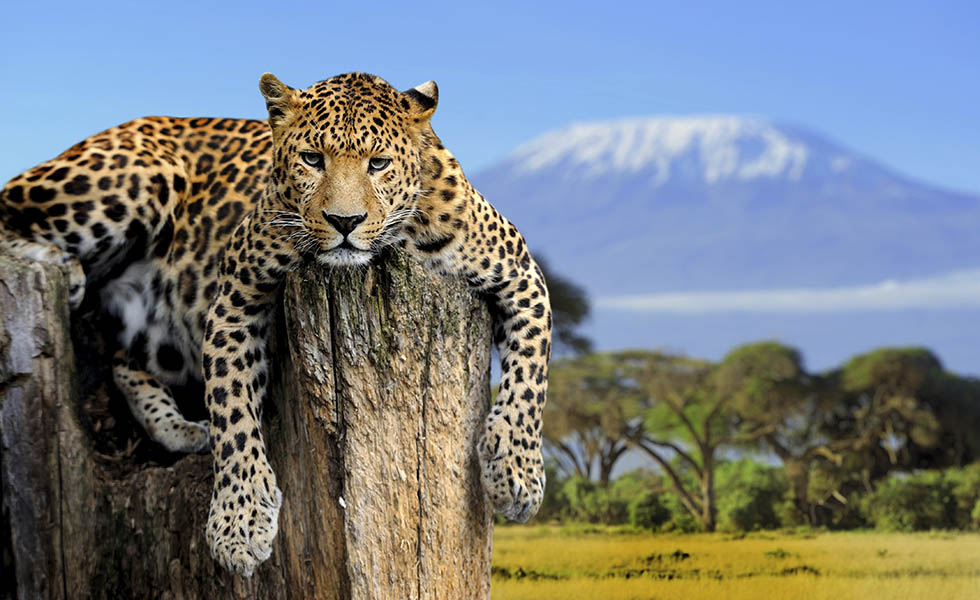
Scenically, Lemosho is measured the most varied and most beautiful because it begins in the rainforest, crosses the spectacular Shira Plateau and then combines with the Machame route to share its viewpoints around the southern circuit. Lemosho has low crowds until it combines with Machame. Lemosho is highly recommended and it has an abundance of wildlife such as elephant, buffalo, eland and lion which come over to forage during dry season from Longido game controlled area.

TOUR ITINERARY

Day 0: Arrival day
When you arrive you will be met at the airport by our driver- with a sign bearing your name, then you will drive to Kibo Palace Hotel or Masai Land Hotel in Arusha for dinner and overnight. In the afternoon or evening your GMExpeditions Mountain Guide will meet you for a Kilimanjaro climb briefing and Kilimanjaro equipment check

Dinner on your own, overnight at Kibo Palace or Masai Land Hotel

Day 1: Londorossi Gate (2100m) – Forest camp (2650m)


After breakfast we will start to drive to Londorosi gate for registration (about 2    hours), we will drive through varied farmland with open views over the plains to reach the Lemosho   trailhead. We often have our lunch at the gate before starting to walk. It is an easy day of walking   up a small path through the beautiful forest. This area has a variety of game, and you are likely to   see monkeys and may even see elephants. When you arrive in camp you will see your tents set up and dinner being prepared for you. You will have warm water to wash up.

Dinner and overnight at Mti Mkubwa camp (Big Tree) (2650m).
Trekking time: 2-3 hours walking, depending on the weather and the fitness of the climbers, though we encourage “pole pole” climbing from the start.
Distance: 7km.
Habitat: Montane Forest.

Day 2: Forest Camp (2650m) – Shira 1 Camp (3610m)

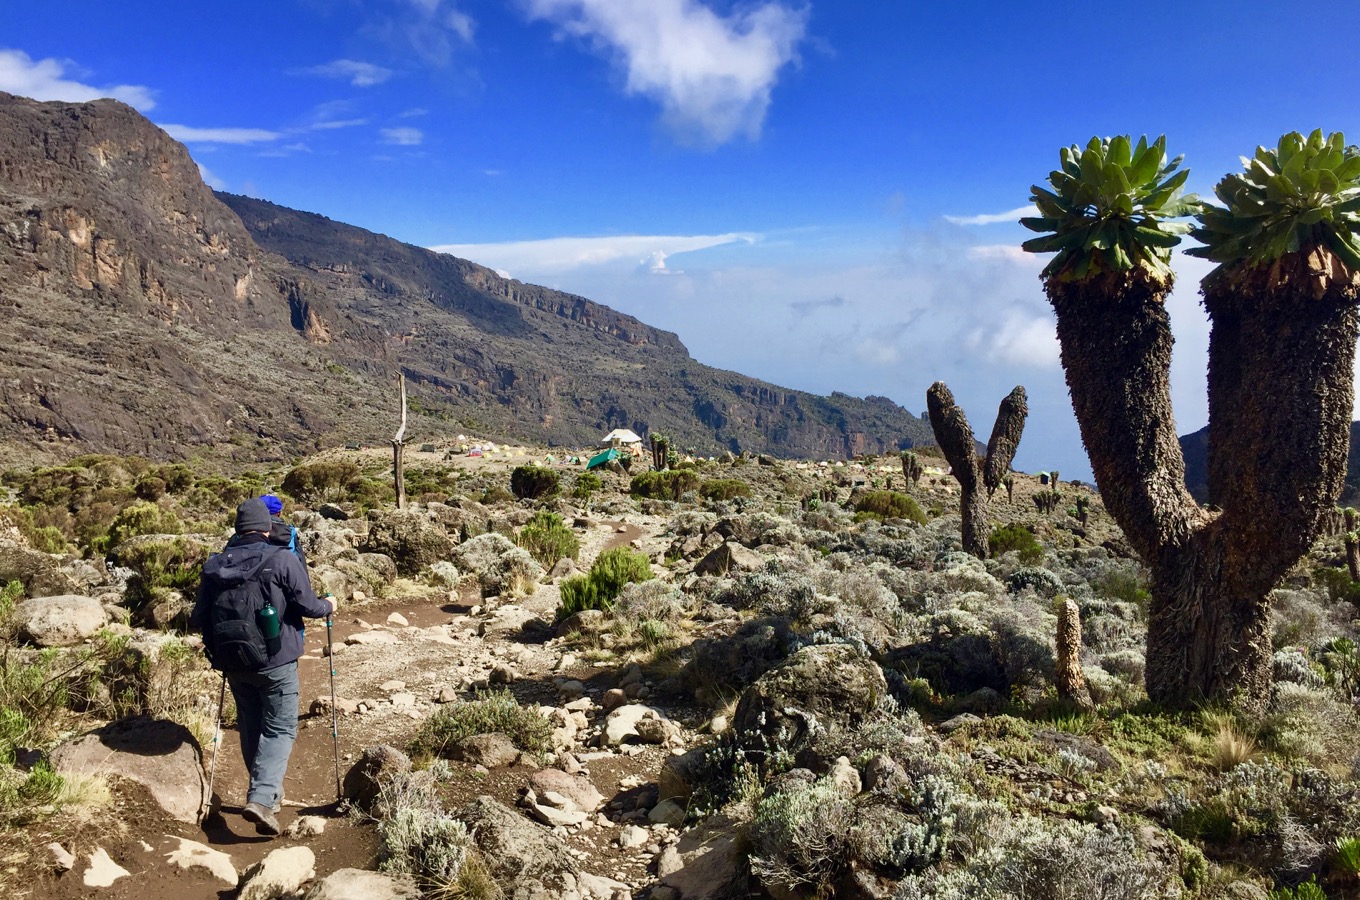
After breakfast, while the porters pack up out camp, we start walking for about an hour and half, then we soon leave the forest behind and enter the moorland zone. As we continue walking the trail climbs steadily with wide views as we reach the rim of the Shira Plateau. Along the trail it is easy to view the Shira Plateau, especially in afternoon if there is no rain or fog.

Dinner and overnight at Shira One camp (3540m).
Trekking time: 6-7 hours walking, with a packed lunch on the way.
Distance: 8km/5mi.
Habitat: Moorland.

Day 3: Shira 1 (3610m) – Moir Hut(4200m)

After breakfast you will start your trek to Moir hut camp.Just after Shira 2 Camp the Lemosho Route joins the Machame Route, and we will follow it for a short time. Expect to see other trekkers there. We’ll diverge from teh main trail and get to Moir Hut Camp which is located beneath the scenic Lent Hills. Arrive at the Moir camp for dinner and overnight.

Dinner and overnight at Moir Hut (4200m).
Trekking time: 6 – 8 hours.
Distance: 14km
Habitat: Semi desert

Day 4: Moir Hut(4200m) – Lava Tower (4600m) – Barranco Camp (3900m)

We will enjoy a morning of gentle ascent and panoramic views, leaving the moir hut behind to walk on lava ridges beneath the glaciers of the Western Breach. After lunch at Lava Tower, we will descend to the bottom of the Barranco Valley to camp. Lava Tower takes us up to (4600m), promoting acclimatization, as we then descend to sleep at 3900m.

Dinner and overnight at Barranco Camp (3900).
Trekking time: 6 – 8 hours walking
Distance: 10km
Habitat: Semi-desert

Day 5: Barranco Camp (3900m) – Karanga Camp (3995m)

A steep climb up the Barranco Wall leads to the trail on the south-eastern side of Kibo, along the southern ice fields. You will enjoy the unique vegetation as you transition from the moorlands to the high alpine desert. The Barranco Wall does involve a fair bit of scrambling up the rock face, while not a technical climb, many see this a some of the most challenging terrain. From the top of the wall, there is only a short distance to our camp at Karanga.

Dinner and overnight at Karanga Camp (3995m), the last water point on the way to the summit.
Trekking time: 4-5 hours walking
Distance: 5km/3mi
Habitat: Alpine Desert

Day 6: Karanga Camp (3995m) – Barafu Hut (4673m)

After breakfast we follow an easy path on compacted earth, with wide views, as we gain altitude to reach the Barafu Hut for lunch. Then following a full briefing of what we need for summit (how to dress and how to pack) and a health and safety briefing, we have an early supper and try to get some sleep.

Dinner and overnight at Barafu (4673m).
Trekking time: 3 – 5 hours walking.
Distance: 4km/2mi.
Habitat: Alpine Desert.

Day 7: Summit attempt Barafu Camp (4673m) – Uhuru Peak (5895m) – Mweka (3100m)

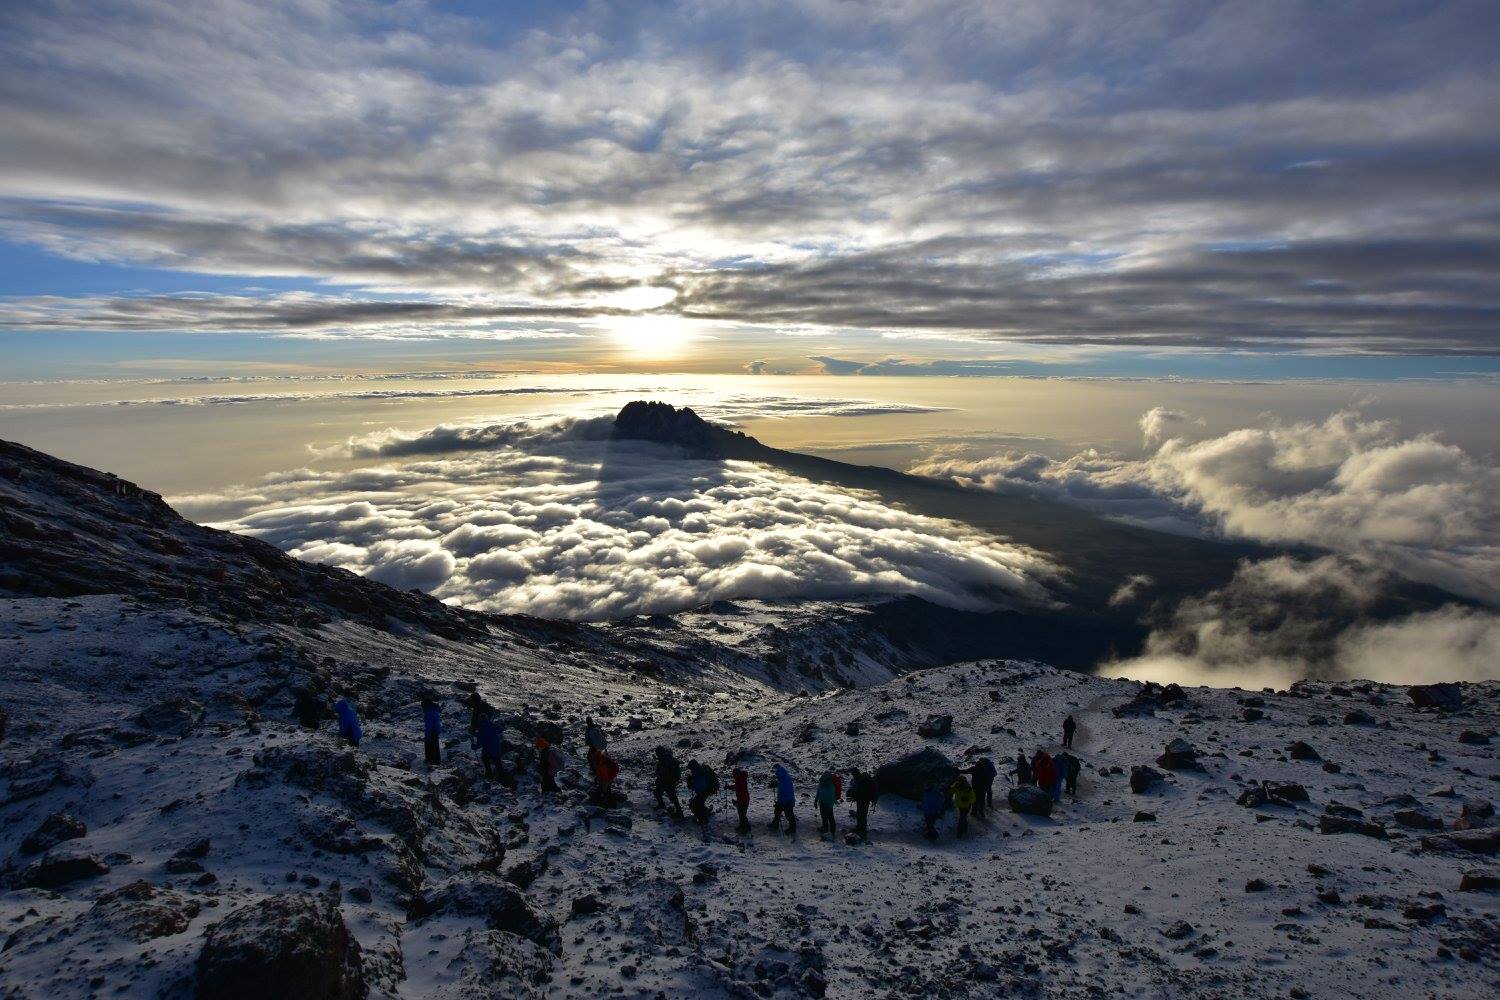
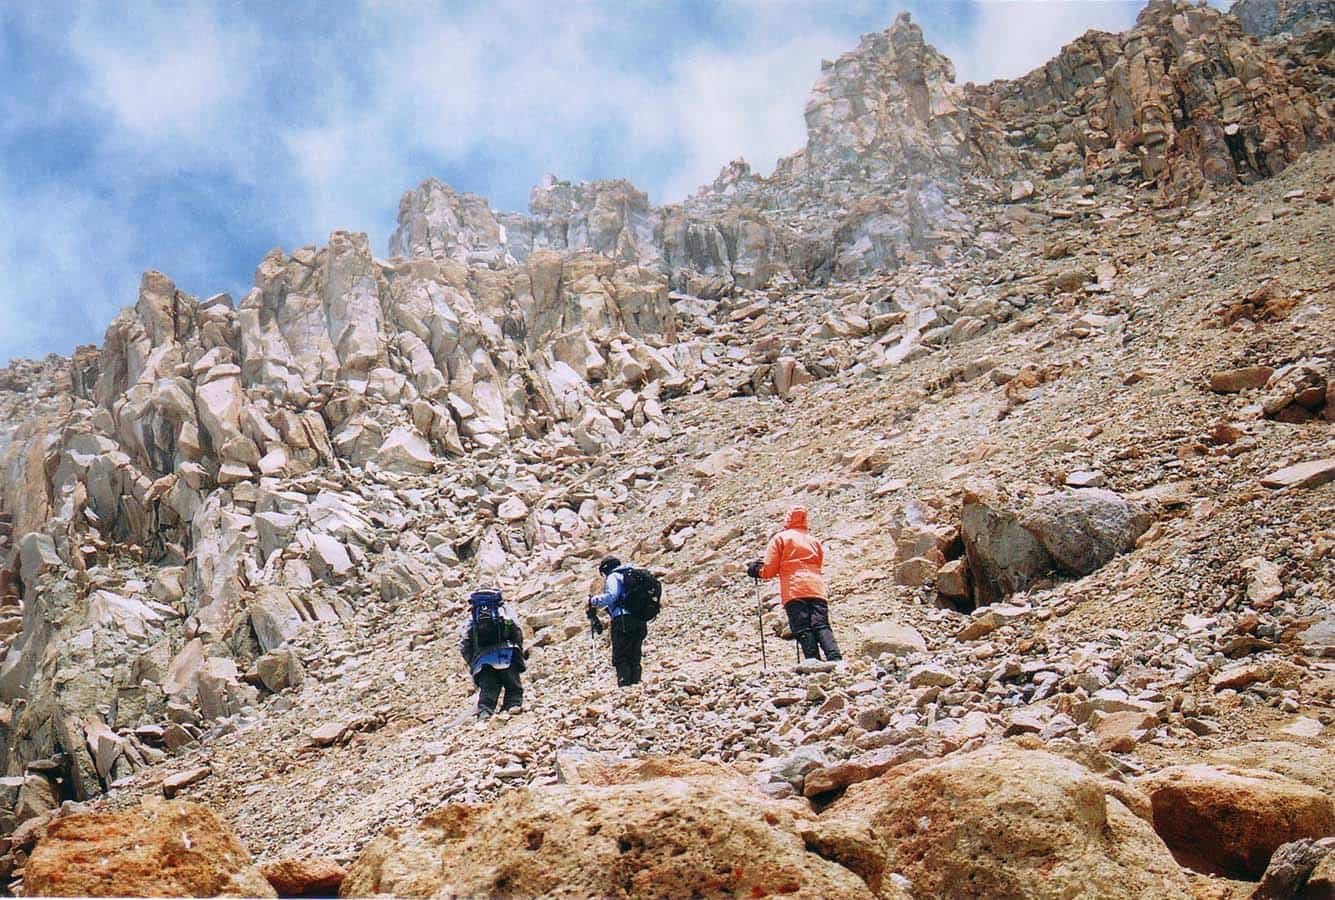
We start our ascent at about midnight to 1 am, depending on the fitness and speed of the climbers, so that we can be up on the crater rim by sunrise. The steep climb over loose volcanic scree and nice graded zig-zags and a slow but steady pace will take us to Stella Point (5756m), in about five or six hours. We will rest there for a short time to enjoy the sunrise over Mawenzi. For those are still feeling strong we will continue with the two-hour round trip from here along the crater rim to Uhuru Peak (5895m), passing close to glaciers and ice cliffs that still occupy most of the summit area. Following ample time for pictures at the summit, we begin the descent back to Barafu for lunch, and after some refreshments, we continue to descend to reach our final campsite at Mweka Camp.

Dinner and overnight at Mweka Camp (3100m).
Distance: 5km/3mi up / 13km/8mi down.
Hiking Time: 5-7 hours up / 5-6 hours down.
Habitat: Stone scree and ice-capped summit.

Day 8: Mweka Camp (3100m) – Mweka Gate (1640m)

A sustained descent on a well-constructed path takes us through a lovely tropical forest alive with bird-song, Our route winds down to Mweka gate at 1640m. We will have lunch at the Gate, a ceremony with the porters congratulating you as you receive your certificate, issued at the gate. We will then drive back to the Masai Land Hotel for a well-deserved shower.

Dinner on your own, overnight at the Kibo Palace  or  Masai Land Hotel. Trekking time: 3-4 hours, Drive: 2-3 hour.
Distance: 10km/6mi.
Habitat: ForestDay 9 – Departure Day

Our packages include departure day services. Enjoy breakfast and a morning sightseeing in the city or join us for one of our Safari Adventures. If you are returning home our driver will bring you to Kilimanjaro International Airport (JRO) to catch your flight home.

Price for 8 Days Lemosho Route is USD $2,455 per person, based on double tent occupancy

My Blog

Are you looking for the best membership site examples to get inspiration?

WordPress is used by some of the biggest and most popular membership sites in the world. By looking at successful membership sites you can learn what they’re doing and improve your site.

In this article, we’ll share some of the best membership site examples that you can use for inspiration and direction.

18 best membership site examples that you should check out
What Do You Need to Build a WordPress Membership Website?
WordPress makes it easy to build nearly any kind of membership website. For example, you can put content behind a paywall, run an online community with a forum, sell pay-per-view content, bundle online courses, and more.

A membership site can be an addon to your existing WordPress blog, or be a standalone online business.

To get started with your own membership site you’ll need four main things:

A domain name: This is the address for your website (ours is wpbeginner.com)
Web hosting: This is where you’ll store your website files, and visitors can access your site
A website builder: This lets you easily build a membership website without code.
A membership addon: This will add membership functionality to your WordPress site.
Usually, a domain name will cost around $15-20 per year, and web hosting starts from $7.95 per month. When you’re just starting, this can be a big investment.

Luckily, Bluehost has agreed to offer our readers a huge discount on web hosting, along with a free domain name, and a free SSL certificate. You can get started for as low as $2.75 per month.

→ Click Here to Claim This Exclusive Bluehost Offer ←

Next, you need to make sure you’re using the right version of WordPress. We recommend using the self-hosted WordPress.org version because it gives you access to all the features you need right out of the box. For more details, see our comparison of WordPress.com and WordPress.org.

You also need a high quality WordPress membership theme and WordPress membership plugin.

If you want to sell subscriptions, paid content, or digital downloads, then a feature rich membership plugin, like MemberPress, is a great option.

3 DAYS, 2 NIGHT SAFARI

DAY 1 – ARUSHA TO TARANGIRE NATIONAL PARK

The first day of your safari will begin by 8AM in the morning with a pick up from your hotel at Arusha.

Once everyone is aboard, you will head towards Tarangire National Park. The 150 Km drive will be covered in about 3hrs.

The national park is extremely famous and special for its diverse landscape and nine different vegetation zones. As you begin your game drive, you will be welcomed by the ancient and gigantic Baobab trees, which make even animals like the giraffe look tiny.

The game drive goes on till about late afternoon and includes a small stop for a picnic lunch. The 3,000 Sq Kms park gets its name from the Tarangire river that flows through it. The river attracts a lot of diverse animals and you should be able to spot a lot of elephants, giraffe, lions, antelopes and zebra.

If it’s your lucky day, you might be able to spot the tree climbing python and the long necked Gerek. The Tarangire National Park has the highest concentration of elephants, which offers a unique chance for you to observe interactions between elephant families.

Don’t forget to capture this beautiful scenery with your camera ready at hand. Post the game drive, you will head back to your camp/lodge where a delicious dinner awaits you. Have good night’s sleep for tomorrow’s adventure.

DAY 2 – NGORONGORO CRATER TO ARUSHA

On this day of your safari, you will have an early start. Finishing up with a quick breakfast you will make an early descend at around 6:30am into the crater floor.

The Ngorongoro crater is the world’s largest inactive, intact and unfilled volcanic caldera. It has a massive floor of about 260 sq kms with a depth of over 2000 feet. The 5 hour game drive in the crater floor, will show you a lot of animal action. Keeping the camera ready is definitely recommended.

The African elephant, buffalo, Black rhino, Hippos, Hyenas, Cheetahs and Lions are found in plenty. Post the picnic lunch at the beautiful Hippo pool, you will begin a steep ascend to the top exit of the crater.

This is the last leg of your safari, with a 4hr drive left to Arusha. You will be dropped off to your preferred location at Arusha by 6PM in the evening.

With an incredible experience and loads of memories to cherish, this is the time you bid goodbye to your team.

DAY 3 – LAKE MANYARA TO ARUSHA

The final day of your safari will kick off by 8 AM with a breakfast game drive after breakfast. Lush forests of Acacia and Mahogany trees begin to set the mood for what is waiting ahead.

The game drive will go on till mid-afternoon with a small break for a picnic lunch. During the game drive watch out for buffaloes, giraffes, impalas, baboons and the blue monkeys.

Another spectacle of the Lake Manyara National park is the tree climbing lions, however spotting them is a game of luck. In the right season, you can see the shoreline turning pink with millions of flamingos flocking there. Keep your cameras at hand, for this is a simply beautiful scene.

By mid noon, you will branch out and head towards Arusha where you will be dropped off to your preferred location by about 6PM in the evening.

With an incredible experience and loads of memories to cherish, this is the time you bid goodbye to your team.

7 Days Rongai Route

Rongai route begins in the northern side of Kilimanjaro Mountain, 45km from Moshi town or 69km from Arusha. This is one of Kilimanjaro easiest routes, and it has become an increasingly popular route in recent years. This route is located on the northern side of Mt. Kilimanjaro with a variety of spectacular landscapes together with different plants and animal’s species. The typical duration for this trip is 6 days. However, you can also add an acclimatization day and make it 7-day climb. The Rongai route is more scenic than the Marangu route and easier than other camping route in climbing Kilimanjaro and the success rate on the Rongai route is very high. Unlike the Marangu route where you sleep in huts, on the Rongai route you sleep in tents, the porter will have your tent pitched and waiting for you at the end of each day trek.

TOUR ITINERARY

Day 0: Arrival day
When you arrive you will be met at the airport by our driver- with a sign bearing your name, then you will drive to Kibo Palace Hotel or Masai Land Hotel in Arusha for dinner and overnight. In the afternoon or evening your GMExpeditions Mountain Guide will meet you for a Kilimanjaro climb briefing and Kilimanjaro equipment check

Dinner on your own, overnight at Kibo Palace or Masai Land Hotel

Day 1: Arusha to Rongai Gate (Nalemoru)(2364m) to Simba Camp(2671m)

Drive to the attractive wooden village of Nalemoru. After signing in and preparing the porters, you will begin the hike on a wide path that winds through fields of maize and potatoes before entering pine forest. The track then starts to climb consistently but gently through attractive forest that shelters a variety of wildlife. The forest begins to thin out and the first camp is at the edge of the moorland zone with extensive views over the Kenyan plains.

Dinner and Overnight at Simba Camp.
Hiking time: 3-4 hours.
Distance: 7km.
Habitat: Montane Forest.

Day 2: Simba Camp(2671m) to Second Cave (3450m)

The morning hike is a steady ascent up to the Second Cave with superb views of Kibo and the eastern ice fields on the crater rim.

Dinner and overnight at Second Cave (3450m).
Trekking time: 3-4 hours.
Distance: 8km.
Habitat: Moorland.

Day 3: Second Cave (3450) to Kikelewa Camp (3600)

Head out across the moorland on a smaller path towards the jagged peaks of Mawenzi. The campsite is in a sheltered valley with giant Senecios nearby.

Dinner and Overnight at: Kikelewa Camp.
Distance: 9km.
Walking Time: 6 hours.
Habitat: Semi-desert.

Day 4: Kikelewa Camp (3600) to Mawenzi Turn Hut (4315)

A short but steep climb up grassy slopes is rewarded by superb views. Leave the vegetation behind shortly before reaching the next camp at Mawenzi Turn, spectacularly situated in a cirque directly beneath the towering spires of Mawenzi. The afternoon will be free to rest or explore the surrounding area as an aid to acclimatization.

If you are spending an extra day on the mountain, you will camp for two nights here. You can hike up and around Mawenzi for your acclimatization hike.

Dinner and Overnight at :Mawenzi Turn Hut (4315).
Distance: 3km.
Walking Time: 2 hours.
Habitat: Semi-desert.

Day 5: Mawenzi Turn (4315) hut to Kibo Hut (4720)

Cross the lunar desert of the ‘Saddle’ between Mawenzi and Kibo to reach Kibo campsite at the bottom of the Kibo crater wall. The remainder of the day is spent resting in preparation for the final ascent very early.

Dinner and Overnight at: Kibo hut
Distance: 9km/5mi
Hiking Time: 4-5 hours
Habitat: Alpine Desert

Day 6: Kibo Hut (4720) to Summit and Horombo Hut (3720)

Very early in the morning (midnight about 1 am), commence the climb to the summit on steep and heavy scree or snow up to Gilman’s Point located on the crater rim (elevation 5700m). Continuing ascend to Uhuru Peak, which is the highest point in Africa. There are unbelievable views at every turn. Have your picture taken at the summit to show your friends and family. From here we descend, stopping for lunch and a rest at Kibo before continuing on to the Horombo encampment.

The beginning of this climb is done in the dark and requires headlamps or flashlights. It will be very cold until you start descending, so you will need all of your warm layers. This is by far the most difficult part of the trek with many switchbacks. Going slowly “pole pole” and an optimistic attitude will get you there!

Dinner and Overnight at : Horombo Hut (3720m)
Distance: 6km/4mi up / 15km/9mi down.
Hiking Time: 6-8 hours up / 15km/9mi down.
Habitat: Alpine Desert.

Day 7: Horombo Hut (3720) to Marangu Gate (1879), to Arusha

After breakfast, a steady descent takes us down through moorland to the Mandara Hut. Continue descending through lush forest path to the National Park gate at Marangu. At lower elevations, it can be wet and muddy. Gaiters and trekking poles will help. Shorts and t-shirts will probably be plenty to wear (keep rain gear and warmer clothing handy). Our vehicle will meet you at Marangu gate to drive you back to your Hotel in Arusha.

Dinner on your own, overnight at the Kibo Palace  or  Masai Land Hotel.
Distance: 20km/12.5mi
Hiking Time: 4-5 hours
Habitat: Forest

Day 8 – Departure Day

Our packages include departure day services. Enjoy breakfast and a morning sightseeing in the city or join us for one of our Safari Adventures. If you are returning home our driver will bring you to Kilimanjaro International Airport (JRO) to catch your flight home.Price for 7 Days Rongai Route is USD $2,325 per person, based on double tent occupancy

7 Days Machame Route

The Machame Route, also known as the Whiskey Route, is better suited for the more adventurous hiker and is one of the more scenic routes up Kilimanjaro.

It is a camping route which offers spectacular views of various landscapes such as Mt. Meru, Pare Mountains, Lake Chala and Lake Jipe. While the 6 day itinerary is very possible, it is very benefit able to have the seven days Machame trek because of having one more extra day for acclimatization and resting before the summit day. Doing this will maximize your chance of reaching the top.

TOUR ITINERARY

Day 0: Arrival day
When you arrive you will be met at the airport by our driver- with a sign bearing your name, then you will drive to Kibo Palace Hotel or Masai Land Hotel in Arusha for dinner and overnight. In the afternoon or evening your Jambo Destinations Mountain Guide will meet you for a Kilimanjaro climb briefing and Kilimanjaro equipment check

Dinner on your own, overnight at Kibo Palace or Masai Land Hotel

Day 1: Machame Gate (1800m) to Machame Camp (2835m)

On the way to Mount Kilimanjaro National Park the journey passes through the village of Machame, which is located on the lower slopes of the mountain. Once you leave the park gate you will walk through the rain forest on a winding trail up a ridge until you reach the Machame Camp.

Dinner and Overnight at Machame Camp(2835M).
Hiking time:
5-7 hours
Distance: 11km.
Habitat: Montane Forest.

Day 2: Machame Camp (2835) to Shira cave Camp (3750m)

Shortly after leaving the Machame camp you will leave the glades of the rain forest and continue on an ascending path to a steep rocky ridge, covered with heather. The route then turns west onto a river gorge onto the Shira Campsite.

Dinner and overnight at Shira cave Camp (3750m).
Trekking time: 4-5 hours walking, with a packed lunch on the way.
Distance: 5km.
Habitat: Moorland.

Day 3: Shira Cave Camp (3750m) to Barranco Camp (3900m)

From the Shira Plateau, you will continue to the east up a ridge eventually passing the Lava Tower, called the “Shark’s Tooth.” Shortly after the tower, you come to the second junction which brings you up to the Arrow Glacier and continuing on to the Barranco campsite.

Dinner and overnight at Barranco camp (3900m).
Trekking time: 5 – 6 hours walking.
Distance: 10km.
Habitat:Semi-desert.

Day 4: Barranco Camp (3900m) – Karanga Camp (3995m)

A steep climb up the Barranco Wall leads to the trail on the south-eastern side of Kibo, along the southern ice fields. You will enjoy the unique vegetation as you transition from the moorlands to the high alpine desert. The Barranco Wall does involve a fair bit of scrambling up the rock face, while not a technical climb, many see this a some of the most challenging terrain. From the top of the wall, there is only a short distance to our camp at Karanga.

Dinner and overnight at Karanga Camp (3995m), the last water point on the way to the summit.
Trekking time: 4-5 hours walking
Distance: 5km/3mi
Habitat: Alpine Desert

Day 5: Karanga Camp (3995m) – Barafu Hut (4673m)

After breakfast we follow an easy path on compacted earth, with wide views, as we gain altitude to reach the Barafu Hut for lunch. Then following a full briefing of what we need for summit (how to dress and how to pack) and a health and safety briefing, we have an early supper and try to get some sleep.

Dinner and overnight at Barafu (4673m).
Trekking time: 3 – 5 hours walking.
Distance: 4km/2mi.
Habitat: Alpine Desert.

Day 6: Summit attempt Barafu Camp (4673m) – Uhuru Peak (5895m) – Mweka (3100m)

We start our ascent at about midnight to 1 am, depending on the fitness and speed of the climbers, so that we can be up on the crater rim by sunrise. The steep climb over loose volcanic scree and nice graded zig-zags and a slow but steady pace will take us to Stella Point (5756m), in about five or six hours. We will rest there for a short time to enjoy the sunrise over Mawenzi. For those are still feeling strong we will continue with the two-hour round trip from here along the crater rim to Uhuru Peak (5895m), passing close to glaciers and ice cliffs that still occupy most of the summit area. Following ample time for pictures at the summit, we begin the descent back to Barafu for lunch, and after some refreshments, we continue to descend to reach our final campsite at Mweka Camp.

Dinner and overnight at Mweka Camp (3100m).
Distance: 5km/3mi up / 13km/8mi down.
Hiking Time: 5-7 hours up / 5-6 hours down.
Habitat: Stone scree and ice-capped summit.

Day 7: Mweka Camp (3100m) – Mweka Gate (1640m)

A sustained descent on a well-constructed path takes us through a lovely tropical forest alive with bird-song, Our route winds down to Mweka gate at 1640m. We will have lunch at the Gate, a ceremony with the porters congratulating you as you receive your certificate, issued at the gate. We will then drive back to the Masai Land Hotel for a well-deserved shower.

Dinner on your own, overnight at the Kibo Palace  or  Masai Land Hotel. Trekking time: 3-4 hours, Drive: 2-3 hour.
Distance: 10km/6mi.
Habitat: Forest

Day 8 – Departure Day

Our packages include departure day services. Enjoy breakfast and a morning sightseeing in the city or join us for one of our Safari Adventures. If you are returning home our driver will bring you to Kilimanjaro International Airport (JRO) to catch your flight home.Price for 7 Days Machame Route is USD $2,250 per person, based on double tent occupancy